When we moved in to our home, we already had a living room furniture set. It happens to be the same color as our walls. Our walls happen to be really really tall, so they will probably always be exactly the color that they are right now. I have been trying to think of ways to add some pops of color so that our living room furniture & walls don't melt into each other and form a big beige blob. We have a ton of windows, so I thought I'd add some color to those with roman shades. Then I saw the prices for custom roman shades and said no-thank-you to that. Then I thought I could just make them myself. So here goes nothing...
I purchased mini blinds- yes I PURCHASED those ugly cheap looking vinyl mini blinds for $3-5/each at Home Depot. I could have gotten a dowel rod and some string and tangled myself up trying to make these from scratch, but I figured using mini blinds as the skeleton would be simpler. And I've heard of a lot of other DIY-ers doing this. After we hung them to make sure they fit (ok, my husband hung them and I supervised) I took them right back down.
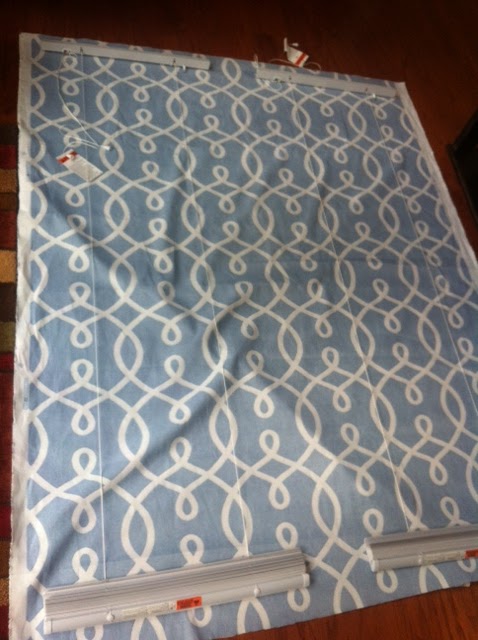
Step 1: Once you have your mini blinds, order enough fabric to cover them. I ordered mine from Fabric.com. I highly recommend this website, as they have great prices, good customer service and free shipping on orders over $35. Spread out your fabric and lay your blinds stretched out on top of them. Cut your fabric around the edges of your blinds. I left an extra inch and a half around all the edges to hem them. If you don't have a sewing machine, just use iron activated hem adhesive, also available at Fabric.com or whatever craft store is nearby. I happen to have a sewing machine that I rarely use, so it makes me feel like it wasn't a waste of money when I'm able to hem things. Because that's about all I can do with it...
 |
| Blinds on fabric- photo taken after ladder stings were cut |
 |
| Hemmed fabric with skeleton blinds on top |
Step 2: Cut the ladder strings off the blinds. These are the flimsier strings on either side and above and below the vinyl blind parts. Don't cut the thick center cord that actually raises the blinds up and down. If you do accidentally cut it, no big deal. Just knot it back together. Once you have all your ladder strings cut, slide off all the vinyl pieces, except the few you use as your shade-fold pieces.
 |
| adjusting pull cord length at bottom piece of blinds |
Step 3: Figure out how many times you want your shade to fold and how big you want your folds to be. My windows were 70 inches long, so I made my shades to have 7 folds 10 inches apart. I saved 7 of the vinyl pieces and left them on. You can really do any number you want and space them out however you like. If you're not sure, leave more vinyl pieces on than you need. They are really easy to cut off if you don't need them. Not so easy to put another one on if you decide later you want another fold or 2. If you need to shorten your blinds, this is easily done by taking the plug out of the very bottom part of the shade, adjusting the pull cord to the correct length, and replacing the plug. I made hash marks with a ball point pen on the left and right side of my fabric (pretty side down, dull side up) exactly 10 inches apart to show me where to glue the vinyl pieces to make my folds.
 |
| Gluing! |
Step 4: Line up your vinyl pieces with your hash marks and glue them on with fabric glue. Make sure you're gluing the dull side. Mine were not perfectly straight, but close enough. There's a little room for fluff since this part is going to fold anyway, and when it "accordions" you won't be able to see each individual fold & all its imperfections. Try not to get glue on the pull strings.


I admire your creativity and practicality! You were able to transform these simple mini blinds into stunning artworks. The choice of color blends well with the shade of your window, doors, and walls. As a result, your doors and windows do not only serve as significant parts of your home, but also as attractive decors that are the result of frugality and artistic hands! You’re not just a natural artist, but also a wise homemaker.
ReplyDeleteMarla Hinds
i love this...i'm going to try it i was going to make faux roman blinds but this is fab and they would work too....i'm excited wish my hubby was home so i could go shopping right now...LOL
ReplyDelete